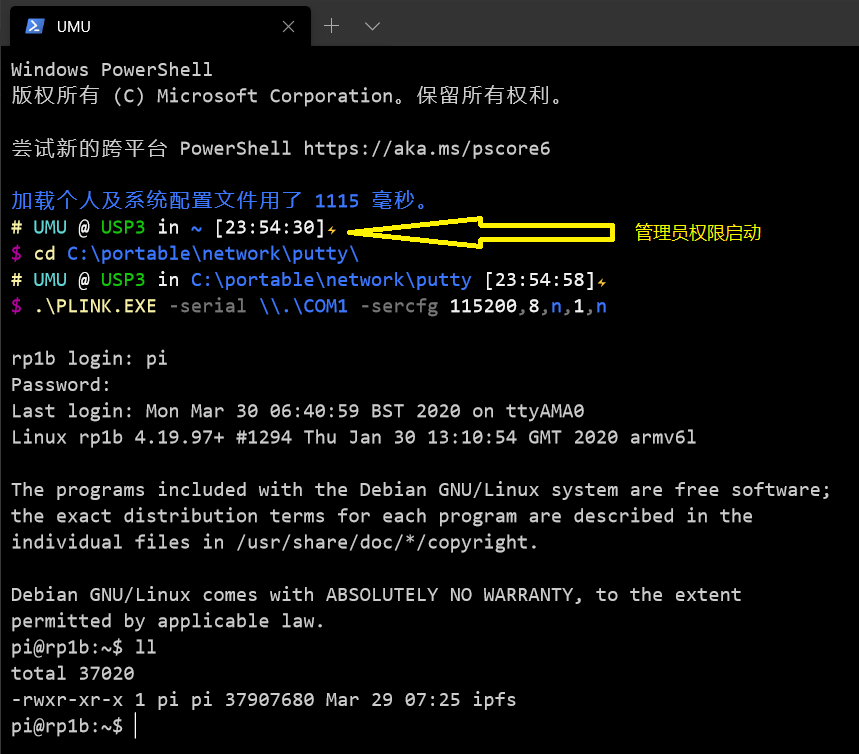
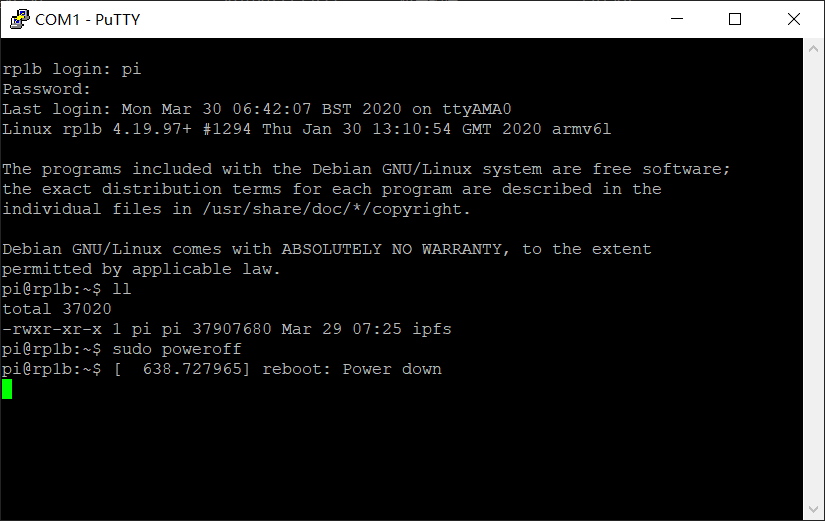
chsh -s zsh

标题是个坑

不要在 Ubuntu 上运行这条命令!都说 CentOS 比 Ubuntu 稳定,总算见识到具体案例!

没有对比就没有伤害

CentOS

1
2
3
4
5
6
$ cat /etc/centos-release
CentOS Linux release 7.7.1908 (Core)

$ chsh -s zsh
Changing shell for root.
chsh: shell must be a full path name

可见,机智的 CentOS,早就料到这个运维事故!

Ubuntu

1
2
3
4
5
6
7
8
9
10
11
$ cat /etc/lsb-release
DISTRIB_ID=Ubuntu
DISTRIB_RELEASE=18.04
DISTRIB_CODENAME=bionic
DISTRIB_DESCRIPTION="Ubuntu 18.04.4 LTS"

$ chsh -s zsh
chsh: Warning: zsh does not exist

$ cat /etc/passwd
root:x:0:0:root:/root:zsh

SSH 到 Ubuntu Server 上,运行 chsh -s zshexit 后就再也无法登录……

如果您要远程做这个试验,记得 exitchsh -s /bin/zsh,或者 vi 手动纠正 /etc/passwd。

macOS 研究经验【2】:简单的破解

1. Beyond Compare

BC 试用版过期,思考 3 秒钟:稣太穷,买不起!

macOS 和 iOS 一样,App 都是独立存储,找出安装信息保存在哪个文件应该很容易。

确实如此!居然只要两步:

1
2
cd ~/Library/Application Support/Beyond Compare
rm registry.dat

2. X-NG

由于子公司、分公司众多,稣的服务器列表里有好多个项,想备份这个列表,发现还不是很容易!

ServerProfileManager

首先,找到 ~/Library/Application Support/X-NG/-local-config.json,但这个文件里只有当前选择的项。

然后,就看代码吧!Swift 写的,应该还好:

1
2
let defaults = UserDefaults.standard
let keys = [

根据代码线索找到:

1
defaults read ~/Library/Preferences/com.yuzhou.X-NG.plist

哇~全部出来了!

macOS 研究经验【1】:关于 APFS Container

起因

最近 MBP15 的硬盘空间告急,打开“磁盘工具”查看,却发现居然有两个“宗卷”!从没认真研究过 macOS 磁盘管理的稣疑惑了。

“磁盘工具”默认“仅显示宗卷”,“显示所有设备”后是这样的:

disk0

disk1

disk1s5

disk1s1

分析

肉眼观测 disk1 是放在 disk0 里的……嗯,想起容器!但 GUI 有时候是会骗人的,用 diskutil 来检查一下:

1
2
3
4
5
6
7
8
9
10
11
12
13
14
15
16
$ diskutil list
/dev/disk0 (internal, physical):
#: TYPE NAME SIZE IDENTIFIER
0: GUID_partition_scheme *251.0 GB disk0
1: EFI EFI 314.6 MB disk0s1
2: Apple_APFS Container disk1 250.7 GB disk0s2

/dev/disk1 (synthesized):
#: TYPE NAME SIZE IDENTIFIER
0: APFS Container Scheme - +250.7 GB disk1
Physical Store disk0s2
1: APFS Volume Macintosh HD - 数据 209.2 GB disk1s1
2: APFS Volume Preboot 79.9 MB disk1s2
3: APFS Volume Recovery 526.6 MB disk1s3
4: APFS Volume VM 8.6 GB disk1s4
5: APFS Volume Macintosh HD 11.2 GB disk1s5

以上可知,只有 disk0 是物理的,disk1 是由 disk0s2 这个分区虚拟出来的。

下面查看两者详细信息对比:

1
2
3
4
5
6
7
8
9
10
11
12
13
14
15
16
17
18
19
20
21
22
23
24
25
26
27
28
29
30
31
32
33
34
35
36
37
38
39
40
41
42
43
44
45
46
47
48
49
50
51
52
53
54
55
56
57
58
59
60
61
62
63
64
$ diskutil info /dev/disk0
Device Identifier: disk0
Device Node: /dev/disk0
Whole: Yes
Part of Whole: disk0
Device / Media Name: APPLE SSD AP0256M

Volume Name: Not applicable (no file system)
Mounted: Not applicable (no file system)
File System: None

Content (IOContent): GUID_partition_scheme
OS Can Be Installed: No
Media Type: Generic
Protocol: PCI-Express
SMART Status: Verified

Disk Size: 251.0 GB (251000193024 Bytes) (exactly 490234752 512-Byte-Units)
Device Block Size: 4096 Bytes

Read-Only Media: No
Read-Only Volume: Not applicable (no file system)

Device Location: Internal
Removable Media: Fixed

Solid State: Yes
Virtual: No
Hardware AES Support: Yes

$ diskutil info /dev/disk1
Device Identifier: disk1
Device Node: /dev/disk1
Whole: Yes
Part of Whole: disk1
Device / Media Name: APPLE SSD AP0256M

Volume Name: Not applicable (no file system)
Mounted: Not applicable (no file system)
File System: None

Content (IOContent): EF57347C-0000-11AA-AA11-00306543ECAC
OS Can Be Installed: No
Media Type: Generic
Protocol: PCI-Express
SMART Status: Verified
Disk / Partition UUID: 1DDCC569-2632-4CD5-88E7-66E2BBE745C9

Disk Size: 250.7 GB (250685575168 Bytes) (exactly 489620264 512-Byte-Units)
Device Block Size: 4096 Bytes

Read-Only Media: No
Read-Only Volume: Not applicable (no file system)

Device Location: Internal
Removable Media: Fixed

Solid State: Yes
Virtual: Yes
Hardware AES Support: Yes

This disk is an APFS Container. APFS Information:
APFS Physical Store: disk0s2
Fusion Drive: No

两者 Virtual 属性的不同,说明前面的猜测是对的。

理论求证

搜到如下参考:

推理正确!

libbloom

概念

Bloom filter 是由 Howard Bloom 在 1970 年提出的二进制向量数据结构,具有很好的空间和时间效率,被用来检测一个元素是不是集合的成员。

Bloom filter 采用的是哈希函数的方法,将一个元素映射到一个 m 长度的阵列上的一个点,当这个点是 1 时,那么这个元素可能在集合内,反之则一定不在集合内。

libbloomBloom filter 的 C 语言实现库,其中哈希函数是 MurmurHash2。

特征

如果检测结果为是,该元素不一定在集合中;但如果检测结果为否,该元素一定不在集合中。

优缺点

  • 优点:插入和查询时间都是常数。它查询元素却不保存元素本身,节省大量的存储空间。当元素是密码时,不保存元素的特征使其具有良好的安全性。

  • 缺点:存在误报(false positive)。当插入的元素越多,错判“在集合内”的概率就越大。另外 Bloom filter 也不能删除一个元素,因为多个元素哈希的结果可能在 Bloom filter 结构中占用的是同一个位,如果删除了一个比特位,可能会影响多个元素的检测。

算法分析

以官方 test-basic 为例,简化的代码如下:

1
2
3
4
5
6
7
8
9
10
11
12
#include <assert.h>

#include "bloom.h"

int main()
{
struct bloom bloom;
assert(bloom_init(&bloom, 1002, 0.1) == 0);
assert(bloom.ready == 1);
bloom_print(&bloom);
bloom_free(&bloom);
}

输出为:

1
2
3
4
5
6
->entries = 1002
->error = 0.100000
->bits = 4802
->bits per elem = 4.792529
->bytes = 601
->hash functions = 4

数学原理参考:《Bloom Filter概念和原理

  • bytes 是最容易理解的,4802 位需要 601 字节存储。

  • bits = bits per elem * entries,每个元素需要多少位 * 元素个数。

  • hash functions = ceil(-ln(error) / ln(2))

  • bits per elem = -ln(error) / ln(2)^2

参考

https://baike.baidu.com/item/bloom filter

学习 Rust【3】所有权

摘要

Rust 三大设计宗旨:内存安全、零成本抽象、实用。本文从所有权角度来学习师兄妹的爱恨情仇“内存安全”。

所有权规则

  • 值归变量所有。

  • 当变量超出使用范围时,变量值所占用的内存将被释放。这是类似于 C++ 的 RAII 概念。

  • 变量值可以由其他变量使用,但需遵守由编译器强制要求的若干规则。

前两条是其它语言也有的,没啥好说,重点放在第三条。

四种使用方法和规则

  • 克隆(clone):此处将值复制到新的变量。新变量拥有新的复制值的所有权,而原始变量保留其原始值的所有权。

    你有一本书,稣按照你那本书,买了一样的书。你的书是你的书,稣的书是稣的书。

  • 移动(move):所有权被转移到另一个要使用该值的变量,原始变量不再拥有所有权。

    学姐含情脉脉地把她的书送给稣。

  • 不可变借用(immutable borrow):没有发生所有权转移,但是可以通过另一个变量读取该值。当借用变量超出范围,内存不会被回收,因为借用变量没有所有权。

    学长不太情愿地把书借给稣,并交代:“书借你,只能看,绝壁不要在上面做笔记,被我发现会砍死你的哦!我偶尔会找你查查。”

  • 可变借用(mutable borrow):可以通过另一个变量对该值进行读取和写入操作。当借用变量超出范围,内存也不会回收,因为借用变量没有所有权。

    稣把书借给学妹时说:“这书你随便用,把稣的书当做你自己的书,等到用不上时再还。”

重点在于一个“借”字:书的所有权属于其主人,但主人将书借出之后,自己是无法再在书上做笔记啦!

不可变借用(immutable borrow)规则

  • 借出期间,借方不能写:学长说过,在书上乱画,要砍死稣!

  • 借出期间,所有者不能写:这书学长已经学完,偶尔要复习,但已经不需要写笔记,借出去之后就更不会写了。

1
2
3
4
5
6
7
8
9
10
11
12
13
14
15
16
17
18
19
20
21
22
23
24
25
26
27
fn main() {
let mut owner = format!("学长的书");

// 学长大笔一挥,在书上记了一点心得!
owner.push('.');

// 稣不可变借用学长的书
let borrower = &owner;

// 学长随时可以来找稣翻翻他自己的书
println!("学长读{}", owner);
println!("学长再读{}", owner);

// 没问题,稣可以读学长的书
println!("稣读{}", borrower);

// error: 书还在稣手里,学长不能写
//owner.push('.');

println!("稣再读{}", borrower);

// error: 学长说过,在书上乱画,要砍死稣!
//borrower.push('.');

// 稣已经归还,学长可以做笔记了
owner.push('.');
}

可变借用(mutable borrow)规则

  • 不能多次可变借用:只能有一个独占的学妹(active borrow),稣不能同时承诺给多个学妹“随便用”,不然学妹们可能打起来……

  • 所有者不能再读写:书在学妹手里随便蹂躏,稣虽然心疼,但不能说!等她爽(huan)了再说吧。

1
2
3
4
5
6
7
8
9
10
11
12
13
14
15
16
17
18
19
20
21
22
23
24
fn main() {
let mut owner = format!("稣的书");

// 学妹可变借用稣的书
let mutable_borrower = &mut owner;

// error[E0499]: cannot borrow `owner` as mutable more than once at a time
// 学姐也要借,稣表示:要书没有,要命一条!
//let mutable_borrower_b = &mut owner;

println!("学妹读{}", mutable_borrower);

// error[E0502]: cannot borrow `owner` as immutable because it is also borrowed as mutable
// 学妹暂时完全掌控稣的书
//println!("稣读不鸟{}", owner);

// 学妹大笔一挥,在书上记了一点心得!
mutable_borrower.push('.');
println!("学妹再读{}", mutable_borrower);

// 书已经归还给稣,稣可以做笔记了
owner.push('!');
println!("稣读{}", owner);
}

诗盗·隐玊

《#诗盗#·隐玊》:诗码中年初白头,科技人生稳如狗。神之八哥思千虑,一算钱袋拮九周。

注解

玊:通“士”。
稳如狗:稳妥地像狗,不是稳定。
神之八哥思千虑:要解决的问题是神级的难,脑力消耗很大。
一算钱袋拮九周:收入不行,只能过着拮据的生活。

改编自霹雳角色玉龙隐士诗号:

书剑青眼初白头,
智殊相悬问机难,
波澜困守役千虑,
一算龙隐决九川。

优化思维【5】合并步骤

前情

在《优化思维【3】消除没必要步骤》提到一个对象转化的例子:A 对象要转为 B 对象,实现时先把 A 对象转为中间对象 T,再将 T 转为 B 对象,由于两步都很容易实现,一个现有函数即可,所以很多人可能会采用这个思路。

下面要介绍的“合并步骤”,类似于优等生解应用题时“跳步”(一行合并多个步骤),可以作为前文的补充。

例子

1. 合并 cat 和 grep

以下命令 UMU 经常看到,其实它可以用 grep UMU test 来优化,减少一次管道交互。

1
cat test | grep UMU

2. 合并多个 sed

再看下面例子是从一个命令行里移除 A 和 C 两个选项:

1
2
3
cmd="EXE A=1 B=2 C=3 D=4"
removed=$(echo $cmd | sed -e 's/ A=[^ ]*//' | sed -e 's/ C=[^ ]*//')
echo $removed

其中两次 sed 可以合并为一次:

  • sed -e 's/ A=[^ ]*//;s/ C=[^ ]*//'

  • sed -e 's/ [\(A\)\(C\)]=[^ ]*//g'

  • sed -e 's/ \(A\|C\)=[^ ]*//g',这个 macOS 上不行。

  • sed -E -e 's/ (A|C)=[^ ]*//g',这个适合 macOS。

3. TFO

先查一下 sysctl net.ipv4.tcp_fastopen,一般应该是 1,说明客户端支持 TFO;如果是 2 则说明服务端支持;3 是同时支持。

TFO (TCP Fast Open) 是一种能够在 TCP 连接建立阶段传输数据的机制。使用这种机制可以将数据交互提前,降低应用层事务的延迟。

这其实也是一种合并步骤的思想,把传输数据合并到三次握手期间。

参考:

跟 UMU 一起玩 OpenWRT(入门篇16):Python3

为什么 Python3?

  1. Shell 不适合某些复杂运算,尤其是 OpenWRT 用的 ash。

  2. Lua 缺乏某些 SDK,比如说阿里云 SDK 就没有 Lua 版。

  3. Python2 已经过时。

  4. Node.js 在小型设备上不如 Python3 高效。

  5. C、C++ 之流太难了!Go、Rust 还得编译,麻烦。

  6. Perl、Ruby 已没落。

一个例子

当 IPv6 地址变化时,将地址发送到钉钉:https://github.com/UMU618/openwrt-ipv6-addresses

安装与调试

1. 安装可执行程序

1
opkg install python3-base

安装 python3-base 之后,就可以运行 python3 了。

1
2
3
4
5
6
7
root@UMU:~# python3
Could not find platform dependent libraries <exec_prefix>
Consider setting $PYTHONHOME to <prefix>[:<exec_prefix>]
Python 3.7.6 (default, Feb 11 2020, 12:41:31)
[GCC 7.5.0] on linux
Type "help", "copyright", "credits" or "license" for more information.
>>>

用以下 Python 代码,打印目前已有的模块:

1
2
3
4
5
6
7
8
9
10
11
12
13
14
15
16
17
18
19
20
21
22
23
24
25
26
27
28
29
30
31
32
33
34
35
36
37
import sys

## 打印的信息太长
i = 0
for m in sys.modules:
i += 1
print('{0:2d} {1:32s} {2}'.format(i, m, sys.modules[m]))

## 不精准
i = 0
for m in sys.modules.values():
i += 1
if m.__spec__:
v = m.__spec__.origin
elif m.__builtins__:
v = '-'
else:
v = ''
print('{0:2d} {1:32s} {2}'.format(i, m.__name__, v))

## 推荐使用
i = 0
for m in sys.modules.values():
i += 1
s = str(m)
start = s.find("'")
end = s.find("'", start+1)
k = s[start+1:end]
start = s.find('from', end+1)
if start > -1:
start += 4
end = s.find('>', start+1)
else:
start = s.find('(', end+1)
end = s.find(')', start+1)
v = s[start+1:end]
print('{0:2d} {1:28s} {2}'.format(i, k, v))

结果为:

1
2
3
4
5
6
7
8
9
10
11
12
13
14
15
16
17
18
19
20
21
22
23
24
25
26
27
28
29
30
31
32
33
 1 sys                          built-in
2 builtins built-in
3 _frozen_importlib frozen
4 _imp built-in
5 _thread built-in
6 _warnings built-in
7 _weakref built-in
8 zipimport built-in
9 _frozen_importlib_external frozen
10 io built-in
11 marshal built-in
12 posix built-in
13 encodings '/usr/lib/python3.7/encodings/__init__.pyc'
14 codecs '/usr/lib/python3.7/codecs.pyc'
15 _codecs built-in
16 encodings.aliases '/usr/lib/python3.7/encodings/aliases.pyc'
17 encodings.utf_8 '/usr/lib/python3.7/encodings/utf_8.pyc'
18 _signal built-in
19 __main__ built-in
20 encodings.latin_1 '/usr/lib/python3.7/encodings/latin_1.pyc'
21 io '/usr/lib/python3.7/io.pyc'
22 abc '/usr/lib/python3.7/abc.pyc'
23 _abc built-in
24 site '/usr/lib/python3.7/site.pyc'
25 os '/usr/lib/python3.7/os.pyc'
26 stat '/usr/lib/python3.7/stat.pyc'
27 _stat built-in
28 posixpath '/usr/lib/python3.7/posixpath.pyc'
29 genericpath '/usr/lib/python3.7/genericpath.pyc'
30 posixpath '/usr/lib/python3.7/posixpath.pyc'
31 _collections_abc '/usr/lib/python3.7/_collections_abc.pyc'
32 _sitebuiltins '/usr/lib/python3.7/_sitebuiltins.pyc'
33 atexit built-in

下面来实现获取 IPv6 地址的功能:

1
2
3
4
5
6
7
8
9
10
11
12
13
14
15
def net_hex_to_ipv6(h):
ipv6 = h[0:4]
i = 4
while i < len(h):
ipv6 += ':' + h[i:i+4]
i += 4
return ipv6

with open('/proc/net/if_inet6') as f:
for line in f:
p = line.split()
if p[3] == '00' and (int(p[4], 16) & 0x80) != 0x80:
ip = net_hex_to_ipv6(p[0])
print(ip)
f.close()

以上代码有个“美中不足”:只能打印地址的“首选格式”,不支持“压缩格式”。下面改进!

2. 安装轻量库

UMU 打算使用 socket 模块的工具函数格式化 IPv6 地址,但目前已安装的 python3-base 不带 socket 模块:

1
2
3
4
>>> import socket
Traceback (most recent call last):
File "<stdin>", line 1, in <module>
ModuleNotFoundError: No module named 'socket'

所以需要安装 python3-light

1
opkg install python3-light

装完即可愉快地玩耍:

1
2
3
4
5
import socket

ip = '0618:0618:0618:0618:0000:0000:0000:0618'
print(ip, '->',
socket.inet_ntop(socket.AF_INET6, socket.inet_pton(socket.AF_INET6, ip)))

以上代码打印:0618:0618:0618:0618:0000:0000:0000:0618 -> 618:618:618:618::618

3. 全量安装

如果 python3-light 还不能满足您,推荐来个全家桶:

1
opkg install python3

PS: 不要以为只要上面这句就全装上了,前面的 opkg install python3-base 是必要的!如果只装 python3,则 /usr/bin/python3 并不存在!

(完)

Node.js 程序员的 C++ 进修指南【1】:SetTimeout

前言

  • 如果您看得懂,那么,这是 Node.js 程序员的 C++ 进修指南。

  • 如果您没看懂,那么,这是学 C++ 的劝退书!

目的

用 C++ 改写 Node.js 程序,主要目的可能有两个:保密、提高性能。

那么您肯定要问:为什么不用 Go 或者 Rust 改写?UMU 是推荐用 Go 或 Rust 的,而且相对改写为 C++ 要简单得多,本系列文章,可能从反面论证:您应该选择用 Go 或者 Rust 改写!

代码仓库

https://github.com/UMU618/cpp-for-nodejs-programmers

第一个例子

在《学习 Rust【2】减少代码嵌套》中,UMU 提到一个使代码平坦化的例子,咱们把其中最基本的功能提炼出来,成为最简单的例子:

1
2
3
4
5
6
7
8
9
10
11
setTimeout(() => {
console.log('step1')
}, 1000)

setTimeout(() => {
console.log('step2')
}, 2000)

setTimeout(() => {
console.log('step3')
}, 3000)

这段代码实现的功能是:一秒后打印 step1,再一秒后打印 step2,再一秒后打印 step3,退出。

翻译为 C++

首先明确一点:JavaScript 是 JIT 语言,不用编译,语言宿主直接解释运行。C++ 是 AOT 语言,需要编译。所以我们需要编译器(比如 g++、clang++)和编译脚本(比如 make、cmake)。下面我们会选择在 macOS 上使用 clang++ 和 cmake 来编译 C++ 代码。其中,cmake 其实是用来产生 Makefile 的,如果您学过 Makefile,可以直接用它。

1. 安装依赖软件

  • 安装 Xcode,以获取 MacOSX.sdk。

  • 安装 clang++ 和 cmake:

1
2
brew install llvm
brew install cmake

2. STL 实现

  • C++ 代码:
1
2
3
4
5
6
7
8
9
10
11
12
13
14
15
16
17
18
19
20
21
22
23
24
25
26
27
28
29
30
31
32
33
34
35
36
37
38
39
40
41
42
43
44
45
46
47
48
49
50
51
52
53
54
55
// set_timeout.cc
// UMU: 这是一个不太好的实现
#include <chrono>
#include <future>
#include <iostream>
#include <vector>

class Timer {
public:
template <typename T>
void setTimeout(T function, int delay);
void stop();
void wait();

private:
bool clear = false;
std::vector<std::thread> pool;
};

template <typename T>
void Timer::setTimeout(T function, int delay) {
this->clear = false;
pool.emplace_back(std::thread([=]() {
if (this->clear) {
return;
}
std::this_thread::sleep_for(std::chrono::milliseconds(delay));
if (this->clear) {
return;
}
function();
}));
}

void Timer::stop() {
this->clear = true;
}

void Timer::wait() {
for (std::thread& thread : pool) {
if (thread.joinable()) {
thread.join();
}
}
}

int main() {
Timer timer;
//timer.setTimeout([&]() { std::cout << "step1\n"; timer.stop(); }, 1000);
timer.setTimeout([]() { std::cout << "step1\n"; }, 1000);
timer.setTimeout([]() { std::cout << "step2\n"; }, 2000);
timer.setTimeout([]() { std::cout << "step3\n"; }, 3000);
timer.wait();
return 0;
}
  • cmake 脚本,CMakeLists.txt:
1
2
3
4
5
6
cmake_minimum_required (VERSION 3.5)
project (set_timeout)

add_executable(set_timeout set_timeout.cc)
set_property(TARGET set_timeout PROPERTY CXX_STANDARD 17)
target_compile_features(set_timeout PRIVATE cxx_auto_type)
  • 编译:
1
2
3
## cd to source code directory
cmake .
make

小结:以上代码,可用,但不推荐。首先它是用多线程模拟的定时器,当设置 N 个定时器时,将创建 N 个线程,这不够优雅。其次,当您取消定时器时,会发现它无法立刻取消并退出线程。

3. Boost Asio 实现

我们知道,Nodejs 内部使用 libuv 作为异步 IO 库,它是 C 实现的,用 C++ 调用 libuv 就显得不那么 C++,所以我们决定用和 libuv 同类且更强大的 Boost Asio 来代替。

  • 安装 boost,目前是 1.72.0 版:
1
brew install boost
  • C++ 代码:
1
2
3
4
5
6
7
8
9
10
11
12
13
14
15
16
17
18
19
20
21
22
23
24
25
26
27
28
29
30
31
32
33
34
35
36
37
38
39
40
41
42
43
44
45
46
47
48
49
50
51
52
53
#include <chrono>
#include <iostream>
#include <vector>

#include <boost/asio.hpp>
#include <boost/asio/steady_timer.hpp>

class Timer {
public:
template <typename T>
void setTimeout(T function, int delay);
void stop();
void wait();

private:
boost::asio::io_context io;
std::vector<boost::asio::steady_timer> timers;
size_t count;
};

template <typename T>
void Timer::setTimeout(T function, int delay) {
auto& timer = timers.emplace_back(boost::asio::steady_timer(io));
++count;
timer.expires_from_now(std::chrono::milliseconds(delay));
timer.async_wait([=](const boost::system::error_code& error) {
// boost::system::error::operation_canceled
// boost::asio::error::operation_aborted
if (!error) {
function();
}
});
}

void Timer::stop() {
for (auto& timer : timers) {
timer.cancel();
}
}

void Timer::wait() {
io.run();
}

int main() {
Timer timer;
//timer.setTimeout([&]() { std::cout << "step1\n"; timer.stop(); }, 1000);
timer.setTimeout([]() { std::cout << "step1\n"; }, 1000);
timer.setTimeout([]() { std::cout << "step2\n"; }, 2000);
timer.setTimeout([]() { std::cout << "step3\n"; }, 3000);
timer.wait();
return 0;
}
  • cmake 脚本,CMakeLists.txt:
1
2
3
4
5
6
7
8
9
10
11
12
13
14
15
cmake_minimum_required (VERSION 3.5)
project (set_timeout)

add_executable(set_timeout set_timeout.cc)
set_property(TARGET set_timeout PROPERTY CXX_STANDARD 17)
target_compile_features(set_timeout PRIVATE cxx_auto_type)

set(Boost_USE_STATIC_LIBS ON)
set(Boost_USE_MULTITHREADED ON)
set(Boost_USE_STATIC_RUNTIME ON)
find_package(Boost 1.71.0)
if(Boost_FOUND)
include_directories(${Boost_INCLUDE_DIRS})
target_link_libraries(set_timeout ${Boost_LIBRARIES})
endif()

小结:好很多,但太难了……这真是劝退书!